3 Pillars of a Lead Magnet Strategy
It took us many years to learn that we could use lead magnets as part of our marketing strategy. In the early days of Endurance Learning we would post documents for download on our pages and have no idea who downloaded them. We’ve since developed this strategy to build lead magnets that support our business.
1. Provide Value in Your Lead Magnet
When we launched our blog in January of 2012 blogging was still pretty novel and our company was three years from being founded. In fact, it was before we even knew we would really start a business and it wasn’t we at all. My now business partner Brian Washburn started a the original Train Like a Champion blog on wordpress.com because he wanted a chance to write and a way to share his thoughts about training. The Train Like a Champion blog lived up until January 2023 when we merged it into EnduranceLearning.com.
Many pages were ranking high in Google for good keywords and we got a lot of downloads of materials we shared. What didn’t often happen was the addition of new customers. We knew the blog needed to be more associated with our company brand. We also knew that we had created real value in the articles. We were missing the opportunity to build relationships with the views. If users didn’t sign up for our mailing list, we never knew they even came to the site.
2. Brand Your Lead Magnet Clearly
The second pillar is branding and it’s one that we skipped early on. We might add a copyright notice or the website in the footer, but not much else. When we launched our Activity Cookbook in 2023 we decided to be more forward. We wrote the resource like a book and included an About Us section and added advertisements throughout. After thousands of downloads, not one person has complained about too many ads because they appreciate the value. In fact, wee now get regular interest in other products directly from the Activity Cookbook.
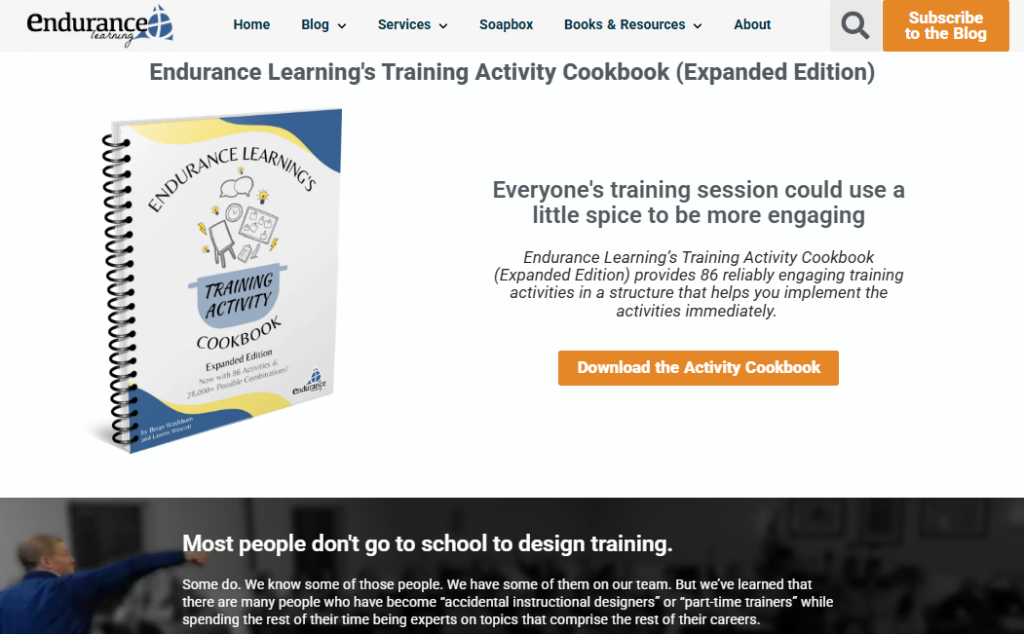
If someone downloaded it and then forwarded it to someone or printed it out, it is still a good advertisement for Endurance Learning, even though we don’t capture everyone’s email. This wasn’t happening for us before. We once interviewed an instructional designer and their work examples were in our Lesson Plan format and the person never mentioned it to us. There was nothing in the format clearly stating that it was an Endurance Learning resource. We had mastered pillar 1, providing value, but weren’t effectively branding.
A great resource doesn’t just solve a problem, it reinforces who solved it. Your lead magnet should look and feel like it came from your business. This includes using consistent colors, your logo, similar formatting, and ideally even your tone of voice. If someone finds the PDF or tool six months from now, they should know exactly where it came from and how to get more.
We’ve found that when a lead magnet is visually branded, it dramatically increases long-term trust. People often forward or save these documents. When it has your URL, your name, and a consistent design, it acts as a second touchpoint every time it’s opened. This isn’t just about aesthetics; it’s about building recall and authority.
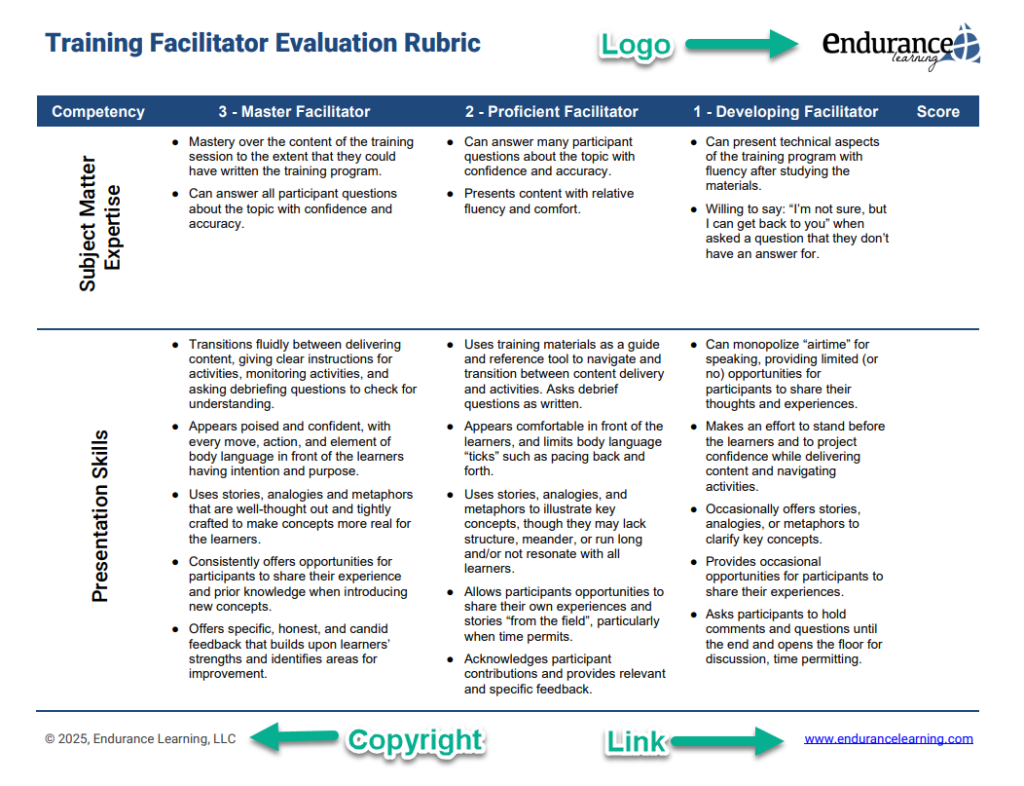
At Endurance Learning, we use templates in Canva and Google Docs that make it easy to keep everything branded with minimal effort. We include a footer with a call-to-action or link to related tools, so even our simplest PDFs keep the conversation going.
3. Capture Prospect Information and Follow Up
Finally, none of this works unless you actually collect and use the information. A lead magnet without a form is just a giveaway. And a form without follow-up is a missed opportunity.
We use forms with name and email fields, embedded directly in our WordPress site via Elementor. What makes our system work is that we include hidden fields that automatically tag the lead, specify what they downloaded, and help us personalize the delivery email. It all runs through a single Zapier automation. That means no matter what the resource is, the process is repeatable and fast.
Once the form is submitted, Zapier sends the download link, adds the lead to our CRM with relevant tags, and pings our team in Slack. This Slack notification is surprisingly valuable—it lets us spot potential leads immediately and follow up while the person still remembers what they downloaded.
Follow-up can be as simple as an automated nurture email or a quick personal note. The key is to treat every download as the start of a relationship, not the end of a transaction. Over time, we’ve found this approach leads to better conversion rates, more conversations, and warmer leads.
I had read and heard over and over that we needed to be using lead magnets. Reading Marketing Made Simple changed everything for me. Read Marketing Made Simple and your marketing will get simpler and be more effective. We feature this book and others in our small business bookshop.
Creating a lead magnet doesn’t have to be complicated. You don’t need a 10-step funnel, retargeting ads, or a marketing automation platform that costs more than your rent. At EnduranceLearning.com, we use a repeatable process that lets us spin up high-value lead magnets quickly, track every interaction, and follow up without overcomplicating things.
Here’s our step-by-step system—and how you can make it work for your small business.
3 Steps to Implementing Your Lead Magnet
This is our internal process. You should adapt it to the platform that you use and your technology stack. There are easier ways to do this if you’re willing to pay.
Both Unbounce and LeadPages allow you to purchase a monthly subscription to quickly build landing pages. If you already manage your own website through WordPress or something similar you’ll find it isn’t that much harder to do it yourself.
Because of how we use hidden fields and a single automation setup, we can:
- Launch new lead magnets without building a new funnel
- Track what resource was downloaded from where
- Avoid managing dozens of automations for different offers
Step 1: Write a Focused Article and Embed the Offer
We write an article that introduces the topic, provides value on its own, and explains why the download is helpful. We don’t gate all the value; we lead with it.
The download form is embedded directly on the page using Elementor, our preferred WordPress builder. This keeps everything in one place and creates a seamless user experience.
Step 2: Build the Form
The first time you set up everything it will take a while. But if you build it to be reused, this will get easier just like the page builders do. Build your form with the obvious visible fields like:
- Name
- Company
- Role
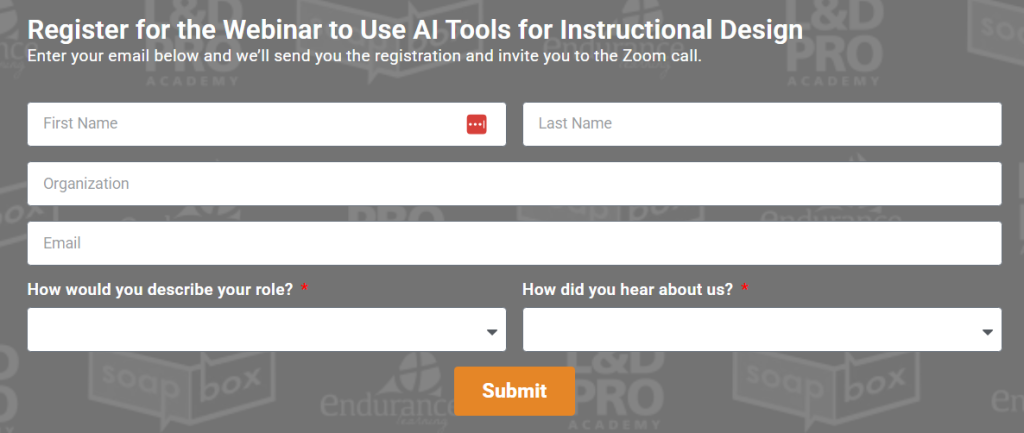
Adding fields to capture this information has been critical in our ability to qualify prospects and to better reach out to these prospects. I know some people get nervous about including fields like Company and Role. Our experience is that adding these fields didn’t diminish submissions and there is good data to support this.
A study by favors.ai indicated that there was a bell curve distribution for success with 4-6 fields leading to the highest rate of field submissions. — What’s The Right Number of Demo Form Fields?
What really changed things for us is when we started making the forms smarter. Every form that we launch includes the same demographic fields and includes hidden fields like EmailText and Form Name that are used by Zapier to generate the email.
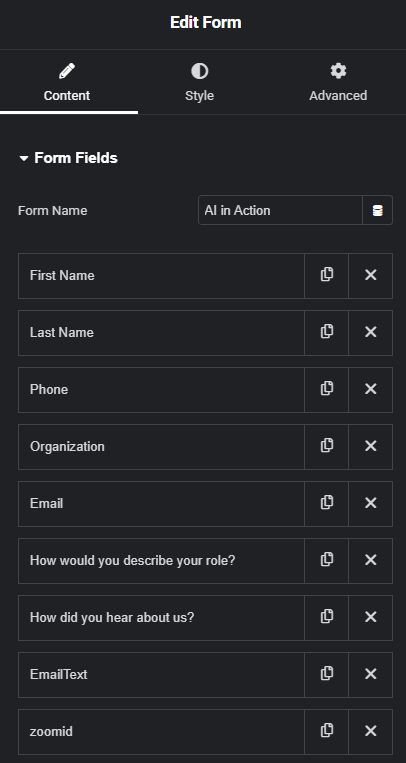
This lets us reuse the same Zapier automation no matter what resource is being downloaded.
You’ll notice a zoomid in this email. This form goes to a slightly different Zap that registers them for the webinar in Zoom. If you’re using a tool like Zoom for webinars you may be able to capture their information in your own registration form and still send their registration to Zoom Webinars.
Step 3: Automate Delivery with Zapier or Make.com
This is the step that replaces what the marketing systems typically do. You can set up a good amount of your automation in Zapier or Make.com.
Once the form is submitted:
1. Zapier picks up the form submissionvia Elementor’s webhook or connected app.
2. The hidden fields guide the email message that gets sent to the user with the download link.
3. The contact is added to our CRM with tags or a specific origin source.
4. A message is sent to Slack, so our team can immediately see when someone downloads a resource. We use this Slack notification to identify potential high-value leads for faster personal follow-up.
Step 4: Create a Follow Up Sequence
Our Zap automatically sends the user to Mailchimp and tags them. Because of this tag they are put into a sequence that shares valuable content and eventually mentions products that they might be interested in.
I recommend checking out a good article about automated email campaigns to learn how to build a follow up sequence that helps build a valuable relationship.
Final Thoughts
This system works because it’s light, flexible, and built to scale. You don’t need a complex tech stack to be effective. You just need a clear value offer, one good form, and a simple automation to connect it all.
If you want to grow your list without growing your overhead, start here. Build your first lead magnet in a day, and let your systems do the rest.